Creating a drop-down list in Excel is one of the easiest ways to streamline data entry, reduce errors, and improve spreadsheet efficiency. Whether you’re managing budgets, tracking inventory, or building surveys, Excel’s data validation tool lets you restrict inputs to predefined options like categories, dates, or custom lists.
Drop-down lists make Excel spreadsheets user-friendly. They speed up data entry and reduce errors. A drop-down list allows you to choose a value from a predefined set of options, making data entry faster and reducing the risk of errors. In this article, we’ll walk you through a step-by-step guide on how to create a drop down list in Excel.
Table of Contents
Step 1: Create a List
The first step in creating a drop-down list is to create a list of the options you want to include. This list can be located anywhere in your workbook, but creating it on a separate sheet is usually best. In this example, we’ll create a list of fruits on a sheet called “Fruit List.”
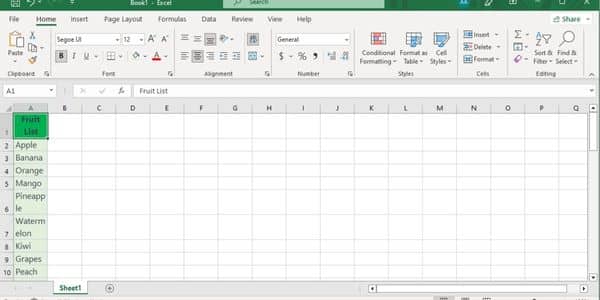
Step 2: Select the Cell
Next, select the cell where you want the drop-down list to appear. In this example, we’ll select cell B2.
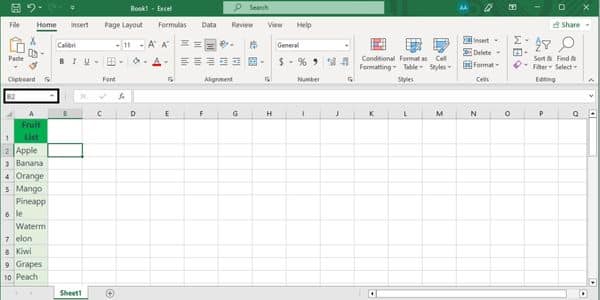
Step 3: Use Excel’s Data Validation Tool
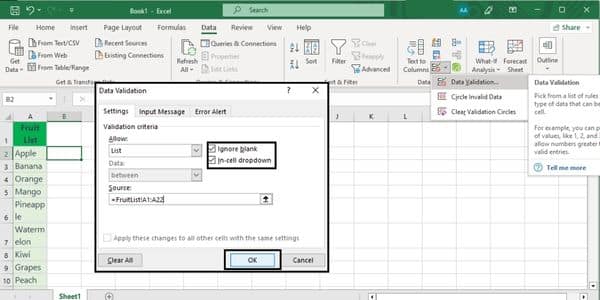
With the cell selected, go to the “Data” tab in the top menu and click “Data Validation” in the “Data Tools” section.
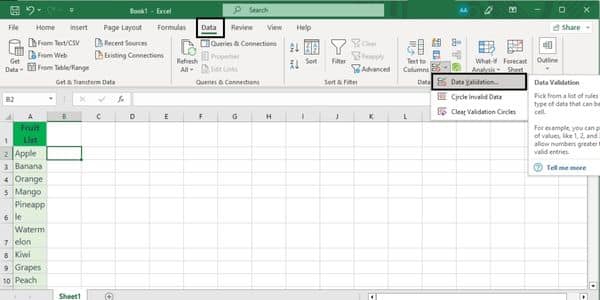
Step 4: Set Validation Criteria
In the “Data Validation” dialog box, select “List” from the “Allow” drop-down menu. In the “Source” field, enter the range of cells that contain your list of options. In this example, we’ll enter “=FruitList!A1:A4”. This tells Excel to use the values in cells A1 through A4 on the “Fruit List” sheet as the options for the drop-down list.
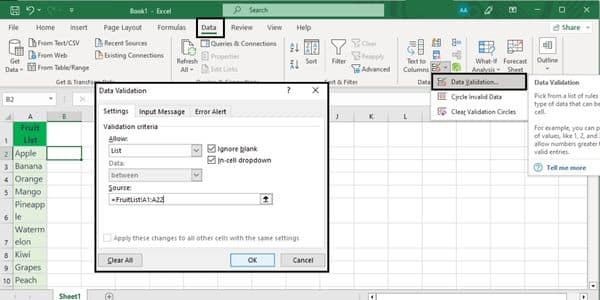
Step 5: Additional Settings
You can also set additional settings for your drop-down list, such as allowing blank cells or limiting the number of characters in the cell. Once satisfied with the settings, click “OK” to create the drop-down list.
Step 6: Test the Drop-Down List
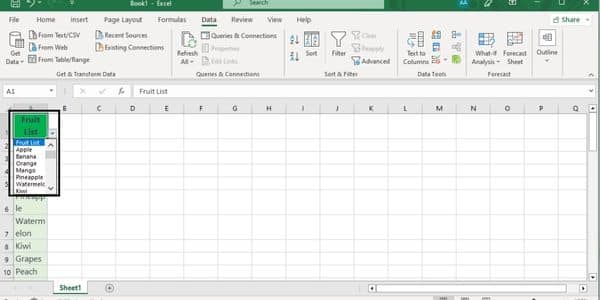
Now you can test your drop-down list by clicking on the cell with the drop-down arrow. You should see the list of options that you entered in the “Source” field. Select one of the options, and it will be entered into the cell.
Step 7: Edit Your Excel Drop-Down List
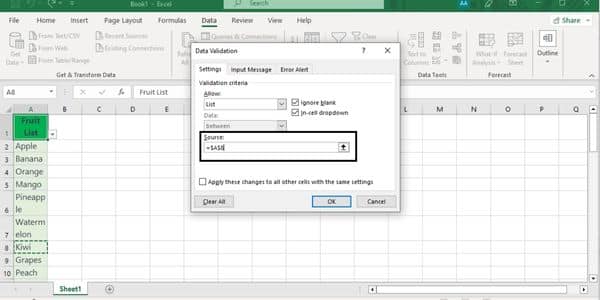
If you need to edit the list of options for the drop-down list, go back to the “Data Validation” dialog box and update the “Source” field with the new range of cells.
In conclusion, creating a drop-down list in Excel is a simple and effective way to improve the usability and accuracy of your spreadsheets. By following these simple steps, you can create a drop-down list that will save time and reduce the risk of errors in your data entry. You can buy a new Windows 10 from Indigo Software and enhance the security of your data. In the server 2019 standard license, you can access the new features of Excel spreadsheets and simplify your daily tasks.
FAQs About Excel Drop-Down Lists
Why isn’t my Excel drop-down list working?
Check for typos in the source range or enable data validation settings.
Can I create a multi-select drop-down list in Excel?
Yes! Use VBA or the “Allow Multiple Selections” add-in. Learn more here.
